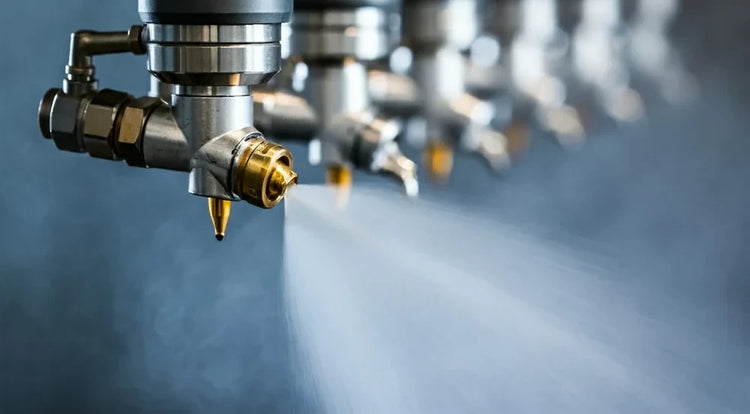
Wax / Protectant Application Nozzles
Applying a wax or protectant coating is the final step in many car-wash cycles. The right nozzle ensures even coverage, optimal dwell, minimal waste, and excellent surface appearance.
Why the Right Nozzle Matters
-
Uniform film formation: Even droplet distribution helps avoid streaks, under- or over-saturated zones, and unsightly spots.
-
Chemical economy: Better coverage with lower flow means less product waste and fewer reworks.
-
Aesthetic outcome: A thin, consistent film enhances gloss, water-sheeting or beading performance, and protective longevity.
-
Smooth cycle integration: Proper pressure, flow, and angle allow wax to be delivered quickly and reliably even in automated environments.
Typical Wax/Protectant Delivery Styles
-
Spray-on, Rinse-off Wax / Sealant — A light misting or atomizing spray that applies the wax/sealant just before final rinse. The rinse then sheens off excess, leaving a protective coat.
-
Foam or Emulsion Protectant — Some wax agents are delivered in foam or emulsion form for better cling and dwell before rinse.
-
Detailing Wax/Maintenance Spray — Often used as a quick, final protective pass for express washes or valet lanes.
Recommended Nozzle Types & Configurations
-
Fine atomizing nozzles — For creating a light mist or fog that spreads thinly and evenly
-
Wide-angle flat-fan or deflected flat-fan nozzles — For broader coverage at low pressures (e.g. > 90°)
-
Hollow-cone or micro-cone nozzles — For circular coverage or if mounted at an angle/offset
-
Low-profile manifolds with drift-minimizing spacing — Ensures coverage and reduces overspray
Materials & Seal Guidance: Use corrosion-resistant metal (e.g. stainless steel) or high-grade polymer nozzles compatible with wax/sealant fluids. Viton or EPDM seals are typically recommended.
Sizing & Best Practices
-
Select appropriate flow and pressure: Wax/sealant sprays typically run in the range of 1–5 PSI to ~60 PSI, depending on viscosity and desired film thickness. Verify with the chemical supplier for nominal flow rates per tip.
-
Spacing & overlap: Use ~ 0.6–0.8 × standoff spacing for flat-fan or atomizing nozzles to ensure full coverage without hotspots.
-
Mount height (standoff): Aim for ~8–18 inches (200-450 mm) depending on nozzle type and chemical spray force. Closer mounting helps produce a finer mist but increases chance of streaking if movement is non-uniform.
-
Sheen or rinse-off stage: If used in spray-then-rinse systems, ensure nozzle pattern complements the rinse jets so wax is sheened and excess removed, leaving a uniform thin coat.
-
Filtration: Inline mesh strainers (60-100 mesh) help prevent clogging. Use quick-disconnect fittings for easy tip maintenance.
-
Maintenance & calibration: Periodically check actual flow vs. spec (±10% tolerance) and inspect nozzle wear or clogging. Replace worn or damaged tips proactively.
Common Issues & Fixes
| Issue / Symptom | Likely Cause | Fix Recommendation |
|---|---|---|
| Uneven wax sheen or blotchy areas | Uneven spray overlap, incorrect nozzle spacing | Adjust spacing, angle, or add additional nozzle to even coverage |
| Excess product or dripping | Over-spray or excessive pressure/flow | Reduce pressure, use finer orifice, ensure proper rinse-off to shear excess |
| Tip clogging or inconsistent spray | Wax particles or sediment in fluid | Clean or replace strainers, flush supply lines, check chemical filter |
| Dry or dull finish over time | Inadequate dwell time or low product concentration | Increase dwell, review dilution rate, or switch to more effective wax concentrate |
| Overspray onto adjacent vehicles | Spray drift or incorrect spray angle/overlap | Narrow nozzles, reduce droplet drift, lower mounting height, or shield nozzle bank |
Suggested NozzlePro Products
-
Fine atomizing nozzles for wax mist
-
Wide-angle flat-fan tips for broader protectant coverage
-
Low-flow, low-pressure sealant-compatible tips
-
Inline wax-resistant strainers and quick-connect adapter kits
(Contact us with your pump pressure, available flow, and chemical type to recommend specific SKU/orifice.)
Additional Tips for Wax / Protectant Application
-
Ensure vehicle surface is clean and mostly dry before applying wax to avoid bonding imperfections.
-
For foam protectants, allow manufacturer-recommended dwell time before rinse or wash off.
-
In windy environments or large bays, consider adding drift-control shields or using nozzles with drift-resistant droplet sizes.
-
During winter/water-softening applications, monitor chemical viscosity changes — thicker protectants may require slightly larger orifices or modest pressure increases.

