Car Wash Detergent Application Nozzles
Effectively applying detergent is the heart of a clean wash. The right spray nozzle optimizes chemical performance, ensures even coverage, and reduces waste—giving customers better results and shorter cycle times.

Why the Right Nozzle Matters
Uniform Coverage
Proper droplet size and spray pattern ensure even detergent pick-up without streaks or gaps.
Chemical Dwell & Activation
Fine sprays or foam help detergent cling to surfaces long enough to emulsify soils.
Reduced Chemical Waste
Better coverage at lower volumes lowers detergent cost per wash.
Faster Processing
Optimized flow and pressure shorten spray times and improve throughput.
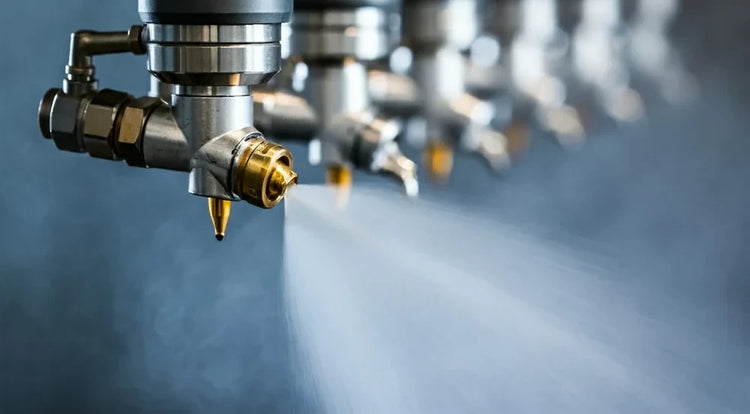
Typical Application Styles
Foam Cannon / Foam Arch
Low-pressure, air-assisted atomizing nozzles create thick, visual foam for branding and cleaning performance.
Low-Pressure Fan Jets
Gentle flat-fan nozzles (40°–110°) for broad detergent coverage early in the wash sequence.
Medium Impact Jets
Narrower flat-fan or cone nozzles (30°–45°) for stubborn soils—bugs, tar, brake dust.
Metered Soap Injectors
Systems mix detergent upstream—nozzle must handle correct dilution, chemical compatibility, and pressure.
Recommended Nozzle Types & Configurations
| Application Scenario | Recommended Nozzle Type | Typical Notes |
|---|---|---|
| General detergent spray | Flat-fan (40°–80°) | Good coverage, moderate flow |
| Fast dwell foaming | Air-atomizing foam nozzles | Creates cling and visual foam |
| Bug/tar/road film loosening | Narrow flat-fan or full cone (30°–45°) | Higher impact, lower drift |
| Chemical-intensive wash stages | Full-cone or high-impact fan | Requires stainless steel or chemical-resistant polymer tips |
Material Guidance: Use stainless steel 316 or corrosion-resistant polymer bodies (PVDF, PTFE), paired with Viton® or EPDM seals for alkaline or acidic detergents.
Selecting & Sizing Guide
Define Target Concentration & Coverage
Determine the GPM or L/min needed based on dilution ratio, dwell time, and bay width.
Choose Spray Angle & Nozzle Spacing
For flat-fans, aim for 50–70% overlap; use standoff of 6–18" (150–450 mm).
Verify Flow vs. Pressure
At detergent pressure (40–80 PSI / 2.8–5.5 bar), measure actual flow; replace tips if off by ±10%.
Consider Chemical Viscosity
Thick soaps or gels can reduce flow; choose slightly larger orifice or add anti-drip features.
Install Filtration
A 60–100 mesh inline filter prevents clogging and ensures consistent spray patterns.
Add Quick-Disconnects & Check Valves
Speeds maintenance and avoids drips when spray is idle between wash cycles.
Best Practices for Detergent Application
- Start bottom-up: Spray lower panels first to avoid run-off contamination on freshly treated surfaces.
- Allow dwell: Let detergent sit for 20–45 seconds (adjust for temperature/chemistry) before pressure rinse.
- Monitor spray patterns: Check for uniform wetting with no pinholes or missed spots—inconsistent sprays often mean worn or misaligned tips.
- Seasonal adjustment: In colder weather, warm the detergent or increase dwell time slightly.
- Routine inspection: Monthly check of tip wear and flow consistency (±10%) ensures reliable performance.
Common Issues & Solutions
| Issue / Symptom | Likely Cause | Recommendation |
|---|---|---|
| Streaking or missed panels | Inadequate overlap or nozzle damage | Adjust nozzle spacing/angle or replace worn tip |
| Excessive chemical use | Overlapping spray or too large orifice | Downsize orifice or reduce pressure |
| Foaming inconsistent or watery | Insufficient air pressure or incorrect foam nozzle | Check air supply, clean/replace foam nozzle |
| Tip clogging | Debris or crystallized detergent | Install or clean inline strainers, flush lines |
| Chemical corrosion or short tip life | Incompatible materials | Upgrade to chemical-resistant materials (PVDF, PTFE, SS316) |
Suggested NozzlePro Products for Detergent Application
- Flat-Fan Detergent Nozzles (various spray angles: 40°–110°)
- Air-Atomizing Foam/Detergent Nozzles
- Foam Application Nozzles
- Inline Detergent Strainers & Mesh Filters
- Quick-Disconnect Adapters & Check Valves
Contact us to find the exact SKU/orifice code that matches your pump curve and desired detergent usage.